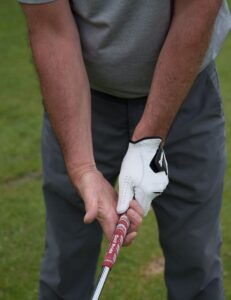
Regripping golf clubs is a crucial maintenance task that can significantly impact your performance on the course. Over time, the golf grips on your clubs wear out, becoming slick and losing their ability to provide a secure hold. In this comprehensive guide, we will take you through the step-by-step process of how to regrip golf clubs, ensuring you have a comfortable and reliable grip for improved control and better shots. Whether you’re a seasoned golfer or a beginner, this guide will equip you with the knowledge and skills needed to regrip your clubs like a pro. Let’s dive in!
Overview
Why Regripping Matters
Choosing The Right Golf Grips
Tools and Materials
Removing the Old Grip
Cleaning the Shaft
Installing the New Grip
Letting the Grip Settle
Finalizing the Regripping Process
Conclusion
Why Regripping Matters
Before we teach you how to regrip golf clubs, it’s essential to understand why regripping your golf clubs is so crucial. The grip is the only point of contact between you and the golf club, and it plays a vital role in your swing and shot execution. Worn-out grips can lead to excessive grip pressure, reduced control, and compromised shot accuracy, and will shorten the lifespan of your gloves. By regripping your clubs with newer and softer grips, you ensure a fresh, tacky, and properly-sized grip that allows for a relaxed and confident hold. This, in turn, promotes a more natural swing, better clubface control, and increased shot consistency.
It will also save you a few bucks. Most golfers buy new clubs when the grips are starting to get old. But why? If you have a pair of clubs you like, just re-grip them and they will feel almost new. Now that we understand the importance of regrip your golf clubs let’s move on to the step-by-step process.

Choosing The Right Golf Grips
Choosing the perfect golf grip is crucial for optimizing your performance on the course. By taking these factors into account and testing different grips, you can find the perfect golf grip that enhances your comfort, control, and overall performance on the golf course.
- Size. Select a grip size that matches your hand size and grip preference. A grip that is too small may cause excessive hand action, while a grip that is too large can restrict your swing.
- Material. Golf grips come in various materials such as synthetic, corded, or rubber grips. Rubber grips provide a soft and tacky feel, while corded grips offer enhanced traction and moisture control.
- Texture. Consider the texture of the grip. Smooth grips provide a consistent feel, while grips with texture or patterns offer added traction and control.
- Firmness. Decide on the firmness of the grip based on your preference. Softer grips absorb shock and provide a comfortable feel, while firmer grips offer increased feedback and control.
- Weather Conditions. Consider the climate you typically play in. If you often play in wet or humid conditions, choose grips with moisture-resistant features for a secure hold.

Tools and Materials
Before you begin the regripping process, you will need a few tools and products to do this process as easy and precise as possible.
- Replacement golf club grips. Choose grips that suit your preferences, taking into account the material, size, and texture.
- Golf grip tape. This double-sided tape provides a secure bond between the shaft and the grip.
- Golf grip solvent. This solution helps in the removal of the old grip and facilitates the installation of new and fresh grips.
- Utility knife. You’ll need a sharp utility knife to cut the old golf club grip and trim excess grip tape, preferably a hook blade, or straight blade but any knife works.
- Grip vise or clamp. This tool securely holds the club during the regripping process.
- Rubber vise clamp. Optional but recommended for stability while trimming excess grip tape.
- Clean cloth or paper towels. These will be used for cleaning the shaft and wiping off excess solvent.
Removing the Old Grip
The first step in the regripping process is removing the old grips. Follow these steps for a smooth and pain-free process.
- Securing the club. Use a grip vise or clamp to secure the club. Ensure that the clubface is easily accessible, and the shaft is stable.
- Cutting off the old grip. With a utility knife, carefully cut off the old grip. Start at the top of the grip and make a lengthwise cut along the grip, being cautious not to damage the club shaft.
- Peeling off the old grip. Once you’ve made the cut, peel off the old grip, gently working your way down the club shaft. Take care not to scratch or dent the shaft while removing the grip and old double-sided grip tape.

Cleaning the Shaft
After removing the old grip, it’s important to clean the club shaft thoroughly so the new grips can be fitted properly and stick into place.
- Applying grip solvent. Apply a small amount of grip solvent to a clean cloth or paper towel.
- Wiping down the club shaft. Use the grip cleaning wipes or solvent-soaked cloth or towel to wipe down the club shaft, ensuring that you remove any residue, dirt, or debris left behind by the old grip.
- Allowing the solvent to evaporate. Allow the solvent to evaporate completely before proceeding to the next step. This ensures a clean and dry surface for the new grip installation.
Preparing the New Grip
Now that the shaft is properly clean, it’s time to prepare the new grip for installation.
- Unwrapping the replacement grip. Unwrap the replacement grip, removing any protective plastic covering.
- Pouring grip solvent. Pour a small amount of grip solvent into the grip, ensuring that it reaches all the way to the bottom.
- Swirling the grip. Swirl the grip around, coating the inner surface evenly with the solvent. This step helps facilitate the installation process.
- Draining excess solvent. Allow any excess solvent to drain out of the grip before moving on to the next step.
Applying Grip Tape
The next step is applying grip tape to the club shaft. The shaft requires taping because it provides a secure foundation for the new grip so it fits and stays in place properly.
- Cutting a grip tape strip. Cut a strip of grip tape lengthwise slightly longer than the length of the club’s shaft.
- Peeling off the tape backing. Peel off the backing of the grip tape, exposing the adhesive side.
- Wrapping the tape around the shaft. Start at the bottom of the shaft and wrap the grip tape around it, overlapping slightly as you go. Ensure the tape is applied smoothly and evenly, avoiding any wrinkles or bubbles.
Installing the New Grip
The finally! It’s time to install the new grip onto the club shaft.
- Sliding the replacement grip. Slide the prepared replacement grip onto the shaft, aligning it with the clubface.
- Applying gentle pressure. Begin applying gentle pressure while pushing the grip down the shaft. Rotate the grip slightly as you push to ensure an even and snug fit.
- Rotating the grip. Continue pushing the grip until it is fully seated and reaches the desired position on the shaft. Rotate the grip as needed to align any logos or patterns to your preference.
- Checking alignment. Check the alignment of the grip to ensure it’s straight and properly positioned. Make any adjustments if necessary.
- Wiping off the excess solvent. Finally, use a clean cloth or paper towel to wipe off any excess grip solvent that may have squeezed out during the installation process.
Letting the Grip Settle
After installing the new grip, it’s important to allow it to settle and bond securely to the club shaft.
- Allowing the grip to sit. Let the newly installed grip sit undisturbed for at least 24 hours. This waiting period allows the grip to dry, set, and bond securely to the club shaft.
- Keeping the club upright. During the settling period, store the club in an upright position to prevent any slippage or misalignment of the grip.
Finalizing the Regripping Process
Once the grip has settled, it’s time to finalize the regripping process.
- Inspecting for residue. Inspect the club for any remaining adhesive residue from the old grip. If you find any, proceed to the next step.
- Cleaning with solvent. Apply a small amount of grip solvent to a clean cloth and wipe the club shaft to remove any leftover residue or solvent.
- Trimming Excess grip tape. Use a utility knife to carefully trim the excess grip tape at the top and bottom of the grip. Take care not to damage the grip or club shaft during this process.
- Using a Rubber shaft clamp. If you need additional stability while trimming the excess grip tape, use a rubber shaft clamp or vise to hold the club securely.
- Admiring Your newly regripped club. With the excess tape trimmed and any residue cleaned off, your regripping process is complete. Take a moment to appreciate your freshly regripped club, ready to improve your game on the golf course.

Conclusion - How to regrip golf clubs
Regripping your golf clubs is a necessary and rewarding process that ensures you have a comfortable and reliable grip on the club. By following the step-by-step guide on how to regrip golf clubs, outlined in this article, you can confidently regrip your clubs and enjoy the benefits of better control, improved shot accuracy, and enhanced performance on the golf course.
Remember to periodically check the condition of your grips and replace them as needed to maintain optimal play. Now, go ahead and give your golf clubs the grip they deserve for when you are walking up to the golf tee and playing the best you possibly can!

